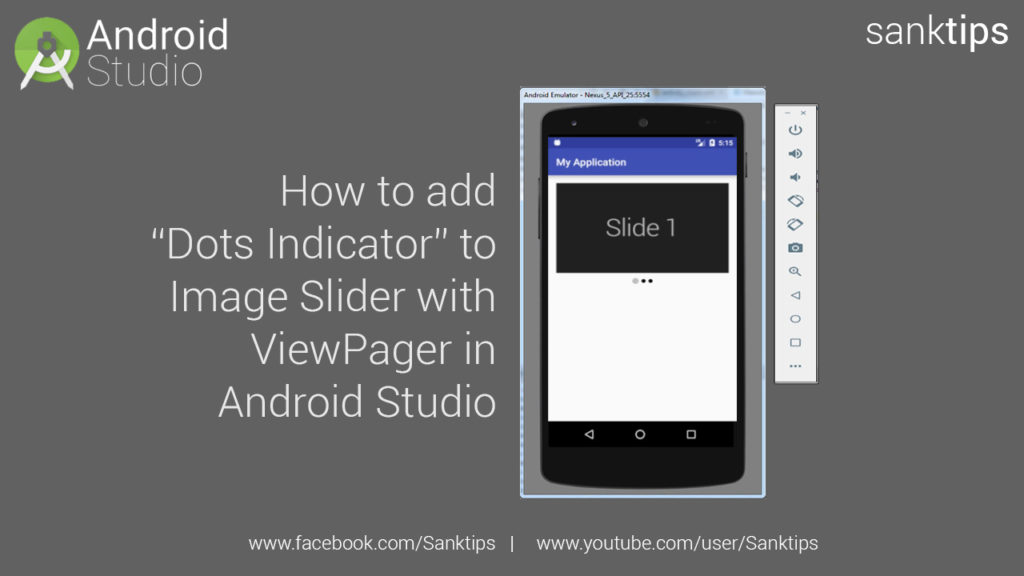
In this article we will see how to add Dots indicator to image slider with ViewPager in Anroid. Adding dots indicator functionality helps to indicate how much images are displayed in the slider.
The Components used in this project are ViewPager and Imageview. With the help of ViewPager we will create the Image Slider and with Imageview will create dots indicator. Lets get started with implementing Image Slider with ViewPager in Android.
You can watch out our video tutorial on this article.
Steps and Source Code for Creating Image Slider with Dots Indicator –
– First we will create a new Project AndroidDotsImageSlider.
– Create an empty activity i.e MainActivity
– After clicking the finish button Android Studio will create MainActivity.java in package folder and
activity_main.xml in res > layout folder.
– Add your images to res > drawable folder that is to be displayed in your Image Slider.
– Now add View Pager to your MainActivity layout file i.e activity_main.xml.
activity_main.xml file:
<?xml version="1.0" encoding="utf-8"?>
<RelativeLayout xmlns:android="http://schemas.android.com/apk/res/android"
xmlns:app="http://schemas.android.com/apk/res-auto"
xmlns:tools="http://schemas.android.com/tools"
android:id="@+id/activity_main"
android:layout_width="match_parent"
android:layout_height="match_parent"
android:paddingBottom="@dimen/activity_vertical_margin"
android:paddingLeft="@dimen/activity_horizontal_margin"
android:paddingRight="@dimen/activity_horizontal_margin"
android:paddingTop="@dimen/activity_vertical_margin"
tools:context="com.test.myapplication.MainActivity">


<android.support.v4.view.ViewPager
android:id="@+id/viewPager"
android:layout_width="match_parent"
android:layout_height="190dp"
android:layout_marginBottom="8dp"/>

<LinearLayout
android:id="@+id/SliderDots"
android:layout_below="@+id/viewPager"
android:orientation="horizontal"
android:gravity="center_vertical|center_horizontal"
android:layout_width="match_parent"
android:layout_height="wrap_content"/>


</RelativeLayout>
– Then we will create one more layout file custom_layout.xml to display how single item will look in our ViewPager.
custom_layout.xml file:
<?xml version="1.0" encoding="utf-8"?>
<LinearLayout xmlns:android="http://schemas.android.com/apk/res/android"
xmlns:app="http://schemas.android.com/apk/res-auto"
android:orientation="vertical" android:layout_width="match_parent"
android:layout_height="match_parent">

<ImageView
android:layout_width="match_parent"
android:layout_height="wrap_content"
app:srcCompat="@mipmap/ic_launcher"
android:scaleType="fitXY"
android:adjustViewBounds="true"
android:id="@+id/imageView" />
</LinearLayout>
– After that you need to create an Adapter to load images in ViewPager. This is done by extending Pager Adapter class into your adapter class i.e ViewPagerAdapter.java
ViewPagerAdapter.java file:
package com.test.myapplication;

import android.content.Context;
import android.support.v4.view.PagerAdapter;
import android.support.v4.view.ViewPager;
import android.view.LayoutInflater;
import android.view.View;
import android.view.ViewGroup;
import android.widget.ImageView;
import android.widget.Toast;


public class ViewPagerAdapter extends PagerAdapter {

private Context context;
private LayoutInflater layoutInflater;
private Integer [] images = {R.drawable.slide1,R.drawable.slide2,R.drawable.slide3};

public ViewPagerAdapter(Context context) {
this.context = context;
}

@Override
public int getCount() {
return images.length;
}

@Override
public boolean isViewFromObject(View view, Object object) {
return view == object;
}

@Override
public Object instantiateItem(ViewGroup container, final int position) {

layoutInflater = (LayoutInflater) context.getSystemService(Context.LAYOUT_INFLATER_SERVICE);
View view = layoutInflater.inflate(R.layout.custom_layout, null);
ImageView imageView = (ImageView) view.findViewById(R.id.imageView);
imageView.setImageResource(images[position]);


ViewPager vp = (ViewPager) container;
vp.addView(view, 0);
return view;

}

@Override
public void destroyItem(ViewGroup container, int position, Object object) {

ViewPager vp = (ViewPager) container;
View view = (View) object;
vp.removeView(view);

}
}
– Now you need to set the adapter to ViewPager in the MainActivity class.
MainActivity.java file:
package com.test.myapplication;


import android.support.v4.content.ContextCompat;
import android.support.v4.view.ViewPager;
import android.support.v7.app.AppCompatActivity;
import android.os.Bundle;

public class MainActivity extends AppCompatActivity {

ViewPager viewPager;


@Override
protected void onCreate(Bundle savedInstanceState) {
super.onCreate(savedInstanceState);
setContentView(R.layout.activity_main);

viewPager = (ViewPager) findViewById(R.id.viewPager);

ViewPagerAdapter viewPagerAdapter = new ViewPagerAdapter(this);

viewPager.setAdapter(viewPagerAdapter);

}

}
– So we are done with displaying the images for our Image Slider with ViewPager.
– Now we will add dots indicator to our slider. This will be done with the help of ImageView.
– First we will create drawable files into res > drawable folder for indicating active and not active image slide.
– To create a drawable file right click on drawable folder select New and click on Drawable resource file. After that add file name and root element in our case its ‘shape’ and click OK.
active_dot.xml file:
<?xml version="1.0" encoding="utf-8"?>
<shape xmlns:android="http://schemas.android.com/apk/res/android"
android:shape="oval" android:useLevel="true"
android:dither="true">

<size android:height="12dip" android:width="12dip"/>

<solid android:color="#bebebe"/>
</shape>
non_active_dot.xml file:
<?xml version="1.0" encoding="utf-8"?>
<shape xmlns:android="http://schemas.android.com/apk/res/android"
android:shape="oval" android:useLevel="true"
android:dither="true">

<size android:height="8dip" android:width="8dip"/>

<solid android:color="#000000"/>
</shape>
– Now we will add code for displaying dots indicator in our MainActivity.
MainActivity.java file:
package com.test.myapplication;


import android.support.v4.content.ContextCompat;
import android.support.v4.view.ViewPager;
import android.support.v7.app.AppCompatActivity;
import android.os.Bundle;
import android.widget.ImageView;
import android.widget.LinearLayout;


public class MainActivity extends AppCompatActivity {

ViewPager viewPager;
LinearLayout sliderDotspanel;
private int dotscount;
private ImageView[] dots;

@Override
protected void onCreate(Bundle savedInstanceState) {
super.onCreate(savedInstanceState);
setContentView(R.layout.activity_main);

viewPager = (ViewPager) findViewById(R.id.viewPager);

sliderDotspanel = (LinearLayout) findViewById(R.id.SliderDots);

ViewPagerAdapter viewPagerAdapter = new ViewPagerAdapter(this);

viewPager.setAdapter(viewPagerAdapter);

dotscount = viewPagerAdapter.getCount();
dots = new ImageView[dotscount];

for(int i = 0; i < dotscount; i++){

dots[i] = new ImageView(this);
dots[i].setImageDrawable(ContextCompat.getDrawable(getApplicationContext(), R.drawable.nonactive_dot));

LinearLayout.LayoutParams params = new LinearLayout.LayoutParams(LinearLayout.LayoutParams.WRAP_CONTENT, LinearLayout.LayoutParams.WRAP_CONTENT);

params.setMargins(8, 0, 8, 0);

sliderDotspanel.addView(dots[i], params);

}

dots[0].setImageDrawable(ContextCompat.getDrawable(getApplicationContext(), R.drawable.active_dot));

viewPager.addOnPageChangeListener(new ViewPager.OnPageChangeListener() {
@Override
public void onPageScrolled(int position, float positionOffset, int positionOffsetPixels) {

}

@Override
public void onPageSelected(int position) {

for(int i = 0; i< dotscount; i++){
dots[i].setImageDrawable(ContextCompat.getDrawable(getApplicationContext(), R.drawable.nonactive_dot));
}

dots[position].setImageDrawable(ContextCompat.getDrawable(getApplicationContext(), R.drawable.active_dot));

}

@Override
public void onPageScrollStateChanged(int state) {

}
});

}

}
– We are done with implementation of our Image Slider. Run the project into your emulator or on an android device to see the results.
Hope you found this article helpful. Do like and follow us on Facebook, Twitter and Google+ for more articles on Android Development.